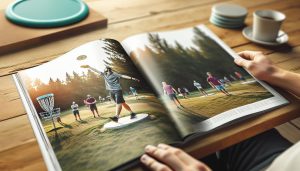
Did you know that dyeing your own disc golf discs not only allows for a creative outlet but can also enhance visibility on the course? Choosing the right dye is crucial for achieving vibrant, long-lasting colors while maintaining the integrity of your disc’s material. Whether you’re a seasoned player looking to customize your gear or a newcomer eager to explore this colorful aspect of disc golf, understanding the best dyeing materials and techniques can elevate your game and personal expression. This guide will delve into essential dye types, offer practical tips, and share insights that cater to both aesthetic desires and performance needs. Ready to transform your discs into one-of-a-kind masterpieces? Let’s dive in!
Choosing the Right Dye for Disc Golf
Choosing the right dye for your disc golf discs can elevate not only the aesthetics of your gear but also foster a deeper personal connection to your game. When diving into the world of disc dyeing, it’s essential to understand the various types of dyes that work effectively with different disc materials, particularly those commonly found in the sport, such as PVD (polyvinyl plastic) and other specialty plastics.
The most popular dyes used in the disc golf community include iDye Poly, which is known for its vibrant colors and longevity. This dye is a favorite because it penetrates the plastic deeply, ensuring that your designs remain vivid even after extensive use. Another commonly used option is RIT dye, but it’s important to note that this version is less effective on certain types of plastics and may require additional steps to achieve a successful result. For those looking for a DIY project, using powdered dye mixed with a binding agent, such as clear glue or acetone, offers a creative way to apply intricate designs while controlling the dye’s flow and saturation.
In selecting a dye, consider the final look you desire. For example, if you’re going for a classic tie-dye effect, making use of color combinations and layering techniques can create stunning results. Conversely, for a solid color or subtle gradient, a simple dip-dye technique might be all you need. Additionally, always check for compatibility with the disc’s material, as this will help you avoid disappointing results. With so many dye options available, experimenting can lead to unique and personalized designs that reflect your style on the course and spark conversations within the disc golf community.
Understanding Different Dyeing Techniques
The art of dyeing disc golf discs is a vibrant and engaging way to personalize your gear, reflecting not just your style but also your approach to the game. Understanding the different dyeing techniques available can enhance your creative process and help you achieve stunning results. Each method has its strengths, making it crucial to select the one that matches your artistic vision and the desired effect.
One of the most popular techniques involves submersion dyeing. In this method, discs are immersed in a heated dye solution, typically made with iDye Poly, which is favored for its ability to penetrate plastics deeply. This technique produces rich, uniform colors and is particularly effective for solid-color dyes or gradient effects. To achieve a submersion dye, simply heat water and dissolve your dye of choice. The disc is then submerged in the solution until the color reaches the desired intensity, usually ranging from a few minutes to several hours depending on the effect you want.
Another intriguing technique is the tie-dye method, which is ideal for those looking to create unique and colorful patterns. This approach involves tying or scrunching the disc before dyeing, allowing for varied color application and creating distinctive swirls and patterns. When using this technique, you can mix different colors to explore vibrant combinations while maintaining a playful aesthetic. To enhance your control over the design, consider using a squeeze bottle to apply dye with precision.
For those who enjoy a more artistic approach, many players turn to stencil dyeing. This method allows for intricate designs by applying a blocking agent, such as glue, to the disc’s surface. Once the glue dries, the disc can be submerged or sprayed with dye, creating a contrasting effect where the glue has blocked the color. This technique is particularly effective for detailed artwork or logos, making your disc truly one-of-a-kind.
Lastly, spray dyeing provides another layer of creativity, enabling players to apply colors in layers and create ombre effects. This technique involves using spray paint or dye in an aerosol can to layer colors gradually, resulting in eye-catching transitions. By experimenting with different distances and angles, you can create depth and texture that’s visually striking.
Embracing these diverse dyeing techniques not only enhances the aesthetics of your discs but also serves as a fun method to express your personality and style on the course. Each method offers a unique outcome, and the only limit is your creativity. Whether you opt for the straightforward beauty of submersion dyeing or the elaborate patterns of tie-dye, the journey of creating your custom disc can be as rewarding as playing the game itself.
Essential Materials for Dyeing Discs

Dyeing your disc golf discs is not just an artistic expression-it’s a way to create a one-of-a-kind piece of equipment that reflects your personality and style on the course. The key to successfully dyeing your discs lies in the materials you choose. Having the right supplies can make the difference between a vibrant, long-lasting color and a disappointing outcome that fades quickly or doesn’t adhere properly.
To start your dyeing journey, you’ll need a few essential items. First and foremost, selecting the right dye is crucial. Dyes specifically formulated for synthetic materials, like iDye Poly, are highly recommended as they penetrate plastic effectively, delivering vibrant, durable colors. You can find a variety of colors and kits tailored for disc golf from several suppliers, ensuring a wide color palette for your creative projects [2].
In addition to your dye, you will need a suitable dyeing container. A large pot or heat-proof container that can hold enough water to submerge your disc is ideal. If you’re using the tie-dye or spray method, squeeze bottles or spray bottles become invaluable for controlling the dye application.
Don’t overlook safety gear; wearing gloves and old clothes is a must since dye can stain skin and fabric. Also, consider using masks if you’re working with aerosol dyes or in poorly ventilated areas to avoid inhaling fumes. A stirring stick or spoon is useful for mixing your dye solutions thoroughly to ensure an even application.
For those opting for stencil or detailed designs, having masking tape and adhesive is essential for creating sharp lines and preventing dye from bleeding. You might also want Acrylic paint or paint markers for touch-ups or additional embellishments post-dyeing.
To sum up, when gathering your materials, think about your chosen dyeing technique and ensure you have everything from dyes to safety gear. With the right supplies at hand, you’ll set the stage for a successful and fulfilling disc dyeing experience!
Step-by-Step Guide to Dyeing Discs
Dyeing your disc golf discs is an exciting way to express your individuality while enhancing your gear. Following a structured approach can ensure your dye job is both vibrant and long-lasting. Here’s a step-by-step guide to help you transform your plain discs into unique, eye-catching pieces of art that will stand out on the course.
Start by prepping your workspace. Choose a well-ventilated area and lay down newspapers or plastic sheets to protect surfaces from dye spills. Gather all your materials including your chosen dye, containers, gloves, and any tools you’ll use, like brushes or spray bottles. Make sure to wear old clothes, as dye can be permanent!
Once your space is ready, decide on your dyeing method. For a traditional immersion technique using powder dyes like iDye Poly, dissolve the dye in hot water according to the package instructions. It’s essential to use a large enough container to fully submerge your disc. If you prefer design techniques, such as tie-dye or stenciling, prepare squeeze bottles or spray bottles filled with diluted dye.
After your dye solution is ready, it’s time to dye your disc. If you’re using the immersion method, submerge the disc in the dye bath for 10 to 30 minutes, depending on the depth of color you desire. For tie-dye effects, apply the dye directly to the surface using squeeze bottles or brushes, creating patterns that reflect your personal style. Remember to rotate your disc or move your dye application tool to get even coverage. If using stencils, place them firmly to prevent the dye from bleeding underneath.
Once your discs have soaked or been painted to your satisfaction, rinse them under cold water until the water runs clear. This removes excess dye and helps set the color. Allow the discs to dry completely on a flat, non-absorbent surface before using them. To enhance your design or add additional details, you can use acrylic paints or markers after the initial dye job is dry.
Lastly, don’t forget to clean up thoroughly and dispose of any dye waste responsibly. Your efforts will not only showcase your creativity but also contribute to your disc golf experience, giving you a personalized touch as you throw your unique creations on the course.
Color Theory in Disc Dyeing

Understanding the intricacies of color theory can significantly enhance your disc dyeing experience, allowing you to create stunning designs that not only stand out on the course but also reflect your personal style. Color theory involves more than just picking your favorite shades; it’s about how different colors interact, evoke emotions, and influence the viewer’s perception. For disc golf enthusiasts, mastering these concepts can turn a simple dye job into a true work of art.
Consider the color wheel as your palette. Primary colors-red, blue, and yellow-are the foundations from which all other colors are made. Mixing these can yield secondary colors such as green (blue + yellow), orange (red + yellow), and purple (red + blue). Additionally, understanding tertiary colors and the concept of complementary colors, where colors opposite each other on the wheel enhance each other’s vibrancy when placed side by side, can lead to more dynamic designs. For example, a blue disc can be beautifully highlighted with accents of bright orange, creating a striking visual contrast that captures attention.
When you choose colors for your disc, think also about the emotional and cultural connotations associated with them. Bright colors like yellow and pink can evoke feelings of happiness and energy, making them perfect for playful designs. In contrast, darker hues like navy or forest green may convey sophistication or a connection to nature, appealing to players seeking a more subtle aesthetic. Experimenting with these emotional attributes can inform not only your design choices but also your branding if you sell custom discs.
To practically apply color theory in your dyeing projects, start by creating samples. Using small sections of a disc, test how different colors blend and react with each other. Remember the importance of layering colors; for instance, applying a layer of red over a yellow base can produce a warm, orange sheen in certain lights. This additive approach allows you to customize your disc’s appearance further, making it more unique. Additionally, try using translucent dyes to allow the disc’s original color to influence the final look. These explorations will enhance your understanding and help you develop a personal style that truly stands out in the disc golf community.
Best Dye Brands for Disc Golf
When embarking on the journey of dyeing your disc golf discs, choosing the right dye is crucial for achieving vibrant, lasting designs. Not all dyes are created equal, and the best brands come with recommendations from those who have tested their products on the course. Several brands stand out for their effectiveness, color vibrancy, and ease of use.
- Rit Dye: A staple in the dyeing community, Rit Dye is renowned for its wide range of colors and ease of use. It’s versatile, working on various materials, including polyester discs commonly used in disc golf. Users often mix it with fabric dye activators to enhance color saturation.
- Dylon Fabric Dye: This dye is another favorite among disc dyers, known for its rich colors and simple application process. Dylon offers both hand and machine-dye options, making it suitable for different dyeing methods.
- iDye Poly: Specifically formulated for synthetic fabrics, iDye Poly produces brilliant, lasting results on the plastic discs. This dye is recommended when trying to achieve those standout hues on modern disc materials.
- Procion MX Dye: For those who prefer a more permanent solution, Procion MX is an excellent choice. It’s a cold water dye often used for tie-dyeing, but it’s also effective for disc dyeing when mixed properly. It offers a unique range of shades that can be layered for complex designs.
- Powdered Fabric Dyes: Dyes like Jacquard and Tulip offer powdered options that can be dissolved in hot water, allowing for a deeper saturation of color. These work well for those who want to float their discs in dye solutions for even coloring.
Understanding which dye brands and their specific attributes cater to your artistic vision is essential. Each dye type offers a unique approach, and experimenting with them can lead to stunning, unique designs that set you apart on the course. Consider your dyeing method, the disc material, and the color outcomes you desire. By choosing among these champion brands, you can cultivate a fresh collection of discs that reflect not just your style, but also your passion for the sport.
Troubleshooting Common Dyeing Issues
When diving into the world of dyeing disc golf discs, it’s not uncommon to encounter a few bumps in the road. No one wants a beautifully crafted dye job ruined by unexpected issues, so understanding how to troubleshoot common problems is key to achieving stunning results. Whether you’re new to the dyeing process or a seasoned pro, knowing how to prevent and fix these issues can save you time, materials, and frustration.
One common problem is uneven coloring, which can occur for several reasons, including improper disc preparation or uneven application of dye. Always start with a clean and thoroughly dried disc to ensure the dye adheres properly. To fix streaks or blotches after dyeing, try submerging the disc back in the dye solution for a short period or applying additional dye with a fine brush to touch up lighter areas. If using a dye that requires heat, ensure the temperature is consistent, as fluctuations can impact the final color.
Another issue is color bleeding, which often happens when the dye isn’t set correctly. To prevent this, make sure to rinse the disc with cold water immediately after dyeing and allow it to dry completely before handling or using it. Be especially cautious with darker dyes, as they tend to bleed more than lighter colors. If you find that a dyed disc is still bleeding after treatment, a quick touch-up might be in order – apply a bit of hot water to the fiber and dye mixture to stabilize it, essentially “resetting” the color.
Lastly, there can be challenges related to color longevity. While some dyes claim to be permanent, exposure to UV light, frequent use, or contact with moisture can cause fading over time. To combat this, consider applying a clear sealant or UV protectant spray after dyeing, which can help preserve your artwork against the elements. Additionally, storing your discs out of direct sunlight and in a cool, dry place can greatly extend the life of your dye job.
In summary, troubleshooting dyeing issues involves a mix of preparation, technique, and aftercare. By being attentive to color application, ensuring proper setting, and taking precautions for longevity, you can turn potential mishaps into learning experiences that enhance your dyeing skills. Embrace the journey of creating custom designs, and don’t let challenges deter your creative spirit!
Preserving Your Dye Job: Tips and Tricks
The vibrant colors you bring to life on your disc golf discs deserve protection, and there are several effective strategies to preserve your artistic creations. A well-executed dye job can significantly enhance your disc’s aesthetic appeal, but without proper care, those beautiful colors can fade or degrade over time. Here are some key tips and tricks that will help safeguard your dye designs, ensuring they remain eye-catching and durable for countless rounds on the course.
Firstly, consider applying a clear sealant after dyeing your disc. This additional layer can protect against UV rays, moisture, and general wear. Choose a UV protectant spray specifically designed for plastics, ensuring compatibility with the material of your disc. After dyeing, allow the disc to dry completely before applying the sealant, and follow the manufacturer’s instructions for best results. This proactive step not only enhances durability but can also give your disc a glossy finish, making the colors pop even more.
Next, storage plays a crucial role in preserving your dye job. Always store your discs in a cool, dry place away from direct sunlight. Extended exposure to UV light can cause colors to fade, so consider using a protective case or bag that shields your discs from environmental elements. A simple suggestion is to keep your dyed discs separate from your regular discs to avoid scratches and scuffs that could damage the artwork.
Additionally, be mindful of how you handle your discs during play. Avoid tossing or dropping them on hard surfaces, as this can chip or scratch the dye. If your disc gets dirty, clean it gently with a damp cloth-harsh chemicals or abrasive scrubbers can damage both the disc and the dye job. When you’re not in use, a dedicated disc carrying bag can not only allow for organized storage but also protect your discs from jostling and potential damage while traveling to the next course.
Lastly, keep an eye on the condition of your dye job over time. Frequent inspections can help catch any early signs of wear or fading, allowing for timely touch-ups or refreshing of the colors. If you’re passionate about maintaining the integrity of your artistic work, invest a little time in aftercare to ensure that every throw represents the creativity and effort you’ve put into your custom designs. Embracing these strategies not only prolongs the life of your beautifully dyed discs but also enhances your overall disc golf experience, allowing you to showcase your unique style proudly throughout your games!
Innovative Ideas for Custom Disc Designs
Creating unique designs on your disc golf discs can transform them into personal statements of style and personality. Custom disc designs not only set your equipment apart but also inspire creativity and self-expression within the disc golf community. Whether you’re a beginner looking to make your first custom disc or an experienced player aiming to showcase your art skills, innovative design ideas can take your discs to the next level.
One exciting approach is to explore various dyeing techniques. The classic spiral dye, for example, allows for a dynamic swirl of colors that can be as vibrant or subtle as you desire. This technique involves twisting the disc and applying multiple dyes from the center outward, creating a stunning rainbow effect. Alternatively, using stencils or masks can enable you to add intricate patterns or logos, resulting in a clean, professional look. By combining these methods, you can develop layered designs that showcase different colors and textures, enhancing the visual appeal of your disc.
Integrating natural elements into your designs can also yield fantastic results. Consider using leaf imprints or flower patterns by pressing real foliage onto the disc before dyeing. This method creates unique textures and images that connect your discs to the outdoors, embodying the spirit of the game. Furthermore, utilizing glow-in-the-dark dyes can make your discs stand out during twilight rounds, adding an element of fun and functionality.
Don’t hesitate to reflect your personal interests or club affiliations in your designs. Whether it’s a favorite sports team, a beloved pet, or an inspiring quote, these personal touches can make your disc a meaningful part of your game. Engaging with the community to gather ideas can also inspire new designs. Hosting a design contest among friends or fellow players can create camaraderie and encourage innovative concepts. Each player can demonstrate their artistry while benefiting from feedback and fresh perspectives.
Above all, remember that practice makes perfect in the world of custom disc design. Embrace the learning process, and don’t be afraid to experiment with new materials and techniques. As you develop your style and skills, your unique discs will not only perform well on the course but will also tell a story about who you are as a player.
Safety Precautions When Using Dyes
When venturing into the colorful world of disc dyeing, safety should be your first priority. Many dyes, particularly those designed for fabric or synthetic materials, contain chemicals that can be harmful if not handled properly. It’s essential to take steps to protect both yourself and your environment while creating your custom designs.
Start by equipping yourself with appropriate protective gear. This includes gloves to shield your hands from staining and potential irritation, as well as safety goggles to protect your eyes from splashes. If you’re working with dyes that release fumes-common with certain dyeing agents-consider using a respiratory mask or working in a well-ventilated area to avoid inhaling harmful substances. Always read the manufacturer’s safety data sheet, which provides detailed information on handling and any specific precautions you should take.
Furthermore, set up your dyeing station thoughtfully. Use an area that can be easily cleaned, like a workspace covered with plastic or newspaper, to catch any spills. Be cautious about your surroundings-keep pets and children away from the dyeing area. For disposal of leftover dye and materials, follow local regulations to ensure you dispose of chemical products responsibly, preventing environmental contamination.
In addition to physical safety, ensure that you understand the properties of the dyes you are using. Some dyes require specific temperatures for activation, so be mindful of your heat source and its safety. Also, many dyes can alter the texture or flight characteristics of your discs, so consider testing small areas first or using less critical discs to refine your technique before committing to your main projects. Taking these precautions will not only make your dyeing experience enjoyable but also safe, allowing you to showcase your creativity without compromise.
Exploring DIY vs. Professional Dye Services
When it comes to bringing your disc golf discs to life with vibrant colors and unique designs, you have two primary options: diving into the DIY dyeing process or opting for professional dye services. Each approach has its advantages and potential drawbacks, making the choice dependent on your personal preferences, budget, and creative aspirations.
Choosing to dye your discs yourself can be an incredibly rewarding experience, allowing for complete creative control over color choices and designs. With the right materials and techniques, you can achieve spectacular results. DIY dyeing typically requires basic supplies such as fabric dye, gloves, brushes, and a well-ventilated workspace. Many enthusiasts enjoy experimenting with different dyeing techniques, such as splatter, ombre, or stencil designs. This hands-on approach not only allows for customization but can also foster a deep sense of accomplishment. However, it does come with a learning curve. Beginners might face challenges in achieving the perfect color saturation or avoiding dye mishaps that could ruin a disc.
On the other hand, if you’re looking for professional quality without the hassle of DIY, choosing a dye service is an excellent option. Professional dye artists possess the skills and experience needed to produce stunning, intricate designs that might be challenging for a novice to replicate. They use specialized materials and techniques to ensure that the colors are vibrant and long-lasting, often providing a level of quality that can stand out in competitive play. While this option may be costlier than DIY, the results can be well worth it if you’re aiming for a high-end finish. Plus, professional services usually handle the entire process, allowing you to focus on your game rather than the potential pitfalls of DIY dyeing.
Ultimately, whether you decide to embark on a DIY journey or hire professionals for your dyeing needs, both options have their unique appeal. Experimenting with your own designs can be a fulfilling creative outlet, while professional dyeing offers assurance of quality and craftsmanship. Consider your skill level, desired outcome, and budget to find the right fit for your disc golf customization needs.
Comparing Costs: DIY Dyeing vs. Buying Custom Discs
When diving into the world of disc dyeing, one of the most significant considerations is the financial aspect-specifically, whether to invest your time and resources into DIY dyeing or to pay for custom discs created by professionals. Both paths have their merits, and understanding the associated costs can help inform your decision.
Creating a unique disc yourself typically involves an initial investment in materials. Basic supplies might include fabric dye, brushes, gloves, acetone for mixing, and protective gear. Depending on the type of dye you choose-such as liquid dye or powdered dye, which often requires heat to set-you could easily spend around $30 to $100 for a starter kit. This one-time cost can yield multiple discs, making each individual custom dye job relatively affordable. However, the real expense can accrue if you make several attempts to perfect your technique. Mistakes during the dyeing process, such as uneven application or color bleeding, may lead to wasted materials or the purchase of new supplies.
Opting for custom discs, on the other hand, can be more straightforward but often comes at a premium. You can find professional dye services ranging from $15 to $50 per disc, depending on the complexity of the design and the artist’s skills. While this may seem steeper than the DIY route, professional dye artists have the expertise and equipment to produce high-quality, vibrant designs that may far surpass what a beginner can achieve without practice. For competitive players looking for standout custom discs that make a statement on the course, this investment might be well worth it.
Cost Comparison Overview
| Item | DIY Dyeing | Professional Custom Discs |
|---|---|---|
| Initial Material Costs | $30 – $100 | N/A |
| Cost Per Disc | $5 – $20 (average after initial cost) | $15 – $50 |
| Time Investment | Variable; includes time to learn techniques | Minimal; service handles the process |
| Skill Development | Possibility for improvement; personal touch | N/A |
In summary, the choice between DIY dyeing and purchasing custom discs boils down to your budget, time constraints, and personal preferences. If you’re looking for a cost-effective way to experiment and express your creativity, DIY may be the way to go. However, for those seeking high-quality, professional results without the learning curve, investing in custom discs is a smart choice that can enhance your game and your enjoyment of the sport.
Faq
Q: What types of dyes are best for disc golf dyeing?
A: The best dyes for disc golf are iDye Poly and fabric dyes like RIT. These dyes bond well with the plastic materials of discs, providing vibrant colors. For submersion dyeing, iDye Poly is recommended, as it’s designed for synthetic fabrics and provides even color distribution.
Q: How do I prepare my disc before dyeing?
A: To prepare your disc for dyeing, start by cleaning it with warm soapy water to remove dirt and oils. Next, sand the surface lightly to help the dye adhere better. This ensures a more vivid and lasting color once dyed.
Q: Can I use regular fabric dye on disc golf discs?
A: While fabric dye can be used, it’s crucial to choose a dye specifically for synthetic materials, like iDye Poly. Regular fabric dyes may not bond effectively with the plastic, resulting in dull colors and quick fading.
Q: What tools do I need for dyeing disc golf discs?
A: Essential tools include a kettle for heating water, a container for submersion, a pair of gloves, and an applicator tool like a fine brush or bottle for precise dye application. Additionally, don’t forget protective masks and old newspapers to safeguard your workspace.
Q: How long should I let the dye sit on the disc during the process?
A: The dye should typically sit for about 10 to 30 minutes, depending on the desired color intensity. Check the color periodically, as thicker plastics may require longer soaking times to achieve the best results.
Q: Is it possible to create multiple colors on one disc?
A: Yes, you can create multiple colors by using a technique called masking. Use masking tape or stencils to cover sections of the disc and dye in layers, allowing each color to dry before applying the next, resulting in vibrant designs.
Q: What safety measures should I take while dyeing discs?
A: Always wear gloves and a mask when handling dyes to protect your skin and lungs. Work in a well-ventilated area, and ensure you have protective eyewear if using chemicals. Following safety precautions prevents harmful exposure and ensures a safe dyeing experience.
Q: Can I dye a disc that has already been dyed?
A: Yes, you can dye an already dyed disc, but it’s essential to use a dye that can work over existing colors. Light colors may not show vibrantly over dark ones, so consider the original dye’s color and the new dye for the best results.
In Conclusion
As you dive into the art of dyeing your disc golf discs, remember that the right materials can transform your game as much as your gear. By selecting quality dyes and understanding different application techniques, you’re not just customizing your discs; you’re enhancing your overall disc golf experience. If you have any lingering questions about dyeing methods or color mixing, don’t hesitate to check out our detailed guides on dyeing techniques and color theory for disc golf.
Feeling inspired? Start experimenting with your own color combinations today, and share your creations with our community! We’d love to see your unique designs-comment below with your favorite looks or any tips you’ve picked up along the way. Also, be sure to explore our recommended resources on disc maintenance and performance tuning to elevate your game even further.
Ready to take the next step? Sign up for our newsletter for exclusive tips and discounts, or visit our disc selection page to find the perfect canvas for your next dye project. Remember, the only limit in disc golf is your imagination-so let’s make it colorful!