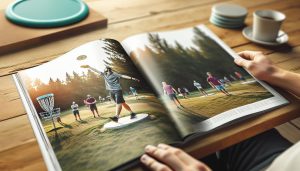
Did you know that customizing your disc golf discs can enhance both your personal style and your performance on the course? Painting your discs not only allows for creative expression but also helps you easily identify your favorite throwers during competition. Whether you’re a beginner looking to make your mark or a seasoned player seeking to embrace the artistry of disc golf, mastering techniques for painting discs can elevate your game and your enjoyment of this beloved sport. In this article, we’ll guide you through essential design tips and techniques, ensuring you have all the tools necessary to create stunning, functional masterpieces. Get ready to unleash your creativity and transform your discs into unique works of art that reflect your individuality!
Choosing the Right Disc for Painting Projects
When embarking on the creative journey of painting disc golf discs, selecting the right disc as your canvas is crucial for both aesthetic appeal and performance. Enthusiasts often underestimate the impact of disc characteristics on their creative process and final results, yet the shape, plastic type, and stability of the disc can significantly influence the outcome of your artwork.
To maintain optimal paint adhesion and longevity, consider using discs made from durable plastics, such as opaque or matte finishes. Avoid shiny or slick plastics, as they can be challenging for paint to adhere to. Discs in the beginner-friendly mid-range weight category (165-175 grams) are often ideal, providing a good balance of throwing performance and ease of handling during the painting process. Moreover, the flight stability of the disc should be factored in; a stable disc will perform reliably, even with your artistic enhancements.
Recommended Disc Types for Painting
- Midrange Discs: These discs are often flat and offer a larger surface area, making them easier to paint.
- Putters: Known for being heavier and more stable, putters allow for great detail work and design.
- Drivers: While they vary in shape, some drivers with a wider profile can make for an exciting canvas but may require more skill to handle.
Ultimately, the choice of disc should align with your artistic vision and how you plan to use the finished product. Experimenting with different disc types can not only enhance your painting skills but also lead to a more personalized play experience as you showcase your unique designs on the course. Embrace the opportunity to explore various shapes and weights, and let your creativity flourish while still considering the fundamental performance aspects essential for disc golf.
Essential Materials for Painting Discs

When it comes to transforming your disc golf discs into unique canvases for creative expression, the right materials play a pivotal role in ensuring lasting results. Gathering the essential supplies not only streamlines the painting process but also enhances the quality and vibrancy of your finished designs. Passionate painters know that preparation is key, and having the appropriate tools at your disposal can make all the difference.
Start with selecting high-quality acrylic paints that provide bright and fade-resistant colors. These paints adhere well to most disc plastics, especially when you prepare the surface correctly. Additionally, a variety of paintbrushes in different sizes will allow you to execute both large areas and intricate details with precision. For those looking to create gradients or smooth transitions, consider investing in a set of sponge brushes or a paint sprayer, which can add depth and texture to your designs.
To enhance your adherence and durability, primer specifically designed for plastic surfaces is recommended. Priming the disc ensures that the paint sticks well and creates a smooth base for your colors. Don’t forget the importance of a good sealer. Once your artwork is dry, a clear acrylic sealer will protect your designs from wear and weather, allowing your creativity to shine on the course for many rounds to come.
In terms of setup, create a clean workspace with newspaper or a drop cloth to catch any drips or spills. Masking tape is invaluable for achieving crisp lines and protecting areas of the disc you wish to leave unpainted. It’s also helpful to have water containers and paper towels handy for cleaning brushes and managing paint consistency. With these materials in hand, you’re well-prepared to dive into your painting project and let your artistic side flourish while you play.
Step-by-Step Guide: Painting Techniques

Painting your disc golf discs is not just an artistic endeavor; it’s an opportunity to express your personality on the course. When engaging in this creative project, following a systematic approach can lead to impressive results and enhance your overall experience. Below is a step-by-step guide to help transform your discs into unique works of art.
Start by preparing your disc. Clean the surface thoroughly with soap and water to remove any dirt or oils that may prevent paint adhesion. After washing, dry the disc completely and apply a plastic primer. This step is crucial as it helps the paint stick and provides a better base for your colors. Once the primer is dry, you’re ready to begin painting.
Choose your desired painting technique. One popular method is using a brush for intricate designs or detailed work. For larger areas, consider sponge brushes or foam rollers, which can cover more space with less effort. If you’re aiming for smooth gradients or blended colors, use a paint sprayer, but be sure to practice on scrap materials first to achieve the desired effect. When using brushes or sponges, apply the paint in thin layers, allowing each layer to dry before adding more to prevent dripping and ensure a clean finish.
After applying your base colors, it’s time to get creative. Use masking tape to create crisp lines and shapes, or even stencils for patterns and logos. Once your design is complete, let the paint dry completely, then finish by sealing your artwork with a clear acrylic sealer. This not only protects the paint but also adds a glossy finish that enhances the vibrancy of your colors.
Remember to clear your workspace and clean your tools as you go. A clutter-free environment reduces accidents and helps maintain focus. With these techniques, you can create stunning, personalized discs that reflect your style and make your game even more enjoyable!
Creative Design Ideas for Disc Golf Discs
Did you know that customizing your disc golf discs can not only enhance their aesthetics but also improve your game by helping you visualize your throws? Whether you’re aiming to showcase your personal style or create a killer gift for a fellow enthusiast, the design possibilities are endless. Getting creative with your disc designs can turn plain plastic into vibrant canvases teeming with personality.
To kick off your design journey, consider themes that resonate with you or your disc golf experiences. Nature motifs are quite popular-think of scenic landscapes, sunsets, or wildlife that inspire your time on the course. Choosing bold colors can help your disc stand out during play, while intricate patterns can reflect your individual style. You might also opt for designs that pay homage to your favorite courses or memorable events you’ve attended. Use solid colors for a minimalist design or mix various hues for a more complex look; the important part is ensuring that the artwork reflects who you are as a player.
When it comes to executing these designs, stencils can be your best friend, allowing for precision in your artwork. Start with a central theme and build around it-perhaps a large graphic at the center with smaller accents radiating outward. Additionally, consider incorporating symbols or logos that resonate with your disc golf community or favorite sports teams. Don’t shy away from collaborating with local artists or using online resources to find template ideas that you can adapt to your style.
Lastly, sharing your designs through social media platforms or local disc golf groups can inspire others while also welcoming feedback-a valuable aspect of the disc golf community. The more you engage with your fellow players, the more ideas you’ll gather, enhancing your artistic journey while deepening your connection to the sport.
Understanding Different Paint Types and Their Uses
Choosing the appropriate paint for your disc golf discs is crucial not only for enhancing aesthetics but also for ensuring durability during play. The world of paint can be overwhelming, but understanding the specific properties of different types helps in making informed decisions that align with your design goals.
Acrylic paint is often favored by many artists for disc painting due to its versatility and ease of use. It dries quickly to a durable finish, making it ideal for beginner and advanced artists alike. Acrylics can be mixed easily to achieve the perfect hue, allowing for infinite customization. Additionally, they can be thinned with water or a medium to adjust the flow for fine details, and most importantly, they adhere well to plastic surfaces, which is what your discs are typically made of.
Spray paint is another popular option, offering a smooth finish and vibrant colors. It’s perfect for larger areas or creating a gradient effect. However, choosing spray paint designed for plastics is essential to avoid issues with peeling or chipping. One strategy is to use a primer designed for plastic discs before applying spray paint, which enhances adhesion and provides a better base for color application.
For those seeking durability and protection, consider using enamel paints. These provide a hard, glossy finish that resists scratches and abrasion, making them excellent for discs that will see frequent use. While enamel usually takes longer to dry than acrylics, it offers greater resistance to wear from throwing and ground contact.
Lastly, don’t overlook specialty paints like iridescent or glow-in-the-dark options that can add unique flair to your creations. These can be layered over your base coat for added visual effects, particularly effective during nighttime play or when showcasing your designs in sunlight.
In summary, whether you’re a casual artist or a serious disc golfer aiming to personalize your gear, selecting the right type of paint can significantly enhance both the appearance and functionality of your discs. By evaluating your design intentions and playing conditions, you can choose paints that not only reflect your artistic vision but also stand the test of time on the course.
Troubleshooting Common Painting Issues
When embarking on the journey of painting your disc golf discs, it’s not uncommon to encounter a few hiccups along the way. Whether you’re a budding artist or a seasoned pro, knowing how to troubleshoot common issues can save you time and ensure your designs turn out beautifully. Here are some practical solutions to frequent painting problems that you might face.
One of the most common issues is poor paint adhesion, often resulting in peeling or flaking once the disc is in use. If you find that your paint isn’t sticking properly, ensure the surface of your disc is clean and free from oils or grease. A quick wipe with rubbing alcohol can help prepare the plastic. Additionally, using a specialized primer designed for plastics can significantly enhance paint adhesion, offering a better base for your chosen colors.
Another frequent challenge is paint running or dripping, particularly when working with spray paints. To avoid this, maintain a steady distance from the disc-typically around 6-12 inches-and apply thin, even coats rather than trying to cover the entire surface at once. This method not only prevents drips but also contributes to a smoother finish. If you do notice drips, let the paint dry completely before gently sanding down the areas with fine-grit sandpaper, then touch up those spots carefully.
If you’re dealing with unsightly brush strokes or uneven coverage when using acrylics, consider your brush technique. Using a higher-quality brush can make a significant difference, as can incorporating a retarder medium to keep the paint workable for longer, allowing you to blend and manipulate the paint without rushing. For finer details, opt for smaller brushes and use a light touch.
Lastly, if environmental conditions are affecting your painting-like humidity or temperature fluctuations-always check the paint manufacturer’s recommendations. They are crucial for optimal curing times and can guide you to the best practices for painting in varying conditions. If you’re working in particularly humid or cold settings, it might be worth waiting for a more suitable day or utilizing a space where you can control the temperature and humidity levels.
By being aware of these potential setbacks and applying these strategies, you can enhance your painting experience and ensure that your disc designs not only look great but also withstand the rigors of gameplay. Remember, every artist faces challenges; it’s the persistence and willingness to learn that truly elevates your craft.
Finishing Touches: Sealing and Protecting Your Artwork
After investing time and creativity into painting your disc golf discs, the final step is to ensure that your artwork is protected for all the games to come. Sealing your painted discs is crucial not just for aesthetic longevity, but also for performance durability, allowing your unique designs to shine while withstanding the rigors of gameplay.
To begin, consider using a clear acrylic spray sealer specifically designed for art projects. These products are generally easy to apply and provide a protective coat that can help guard against scratches, scuffs, and moisture. Look for a sealer that is labeled as UV-resistant; this feature will help prevent fading from sunlight exposure, keeping your designs vibrant over time. Apply the sealer in a well-ventilated space, holding the can approximately 6-12 inches away from the disc to ensure an even coat. It’s advisable to do this in multiple light layers rather than a thick one, as this minimizes the chance of runs and preserves the integrity of your artwork.
Once sealed, it’s important to allow the discs to cure properly. Follow the manufacturer’s instructions regarding drying times, but a rule of thumb is to let them dry for at least 24 hours in a dust-free environment before use. While waiting, consider showcasing your creations at community events or sharing them on social media platforms like Instagram or Facebook, where other disc golf enthusiasts can admire your craftsmanship and perhaps share their own designs in return.
Lastly, don’t overlook storage and maintenance after the discs are painted and sealed. Keep them in a cool, dry place, away from direct sunlight when not in use. A dedicated bag with padded compartments can help prevent physical damage during transport to courses, ensuring that your artistic efforts remain intact. By paying attention to these finishing touches, you ensure that your discs not only perform beautifully on the course but also express your unique style for all to see.
Tips for Customizing Discs for Different Weather Conditions
When it comes to painting disc golf discs, adapting your artwork and techniques to suit different weather conditions can significantly enhance both the aesthetics and functionality of your custom designs. Just as players need to consider the elements during a round, artists must also reflect on how varying conditions, such as humidity, temperature, and exposure to sunlight, can affect their painted creations.
One key aspect to consider is humidity. High humidity can impact paint adhesion and drying times, leading to potential smudging or streaking in your artwork. To combat this, choose paints that are formulated to dry quickly and are resistant to moisture. Acrylic paints are often a great choice, as they tend to dry faster and are more forgiving in humid conditions. Additionally, using a heat gun or hairdryer on a low setting can help speed up the drying process without disturbing your intricate designs.
Temperature fluctuations can also affect your painting process. In colder temperatures, most paints will take longer to cure, increasing the risk of imperfections. If you’re painting outdoors and temperatures drop, consider finishing your projects inside, where you can maintain a consistent environment. On the other hand, extreme heat can cause paint to dry too quickly, potentially leading to a chalky finish or cracks. Again, working in a controlled indoor space can help mitigate these issues.
Lastly, consider the type of disc you are painting. Some plastics perform better in various weather conditions than others. For instance, discs made from durable polymers might hold up better against the rigors of sun exposure and rain compared to lighter materials. Remember to include a protective layer, such as a UV-resistant spray sealant, to enhance the longevity of your artwork, ensuring that sunlight and moisture do not fade or damage your designs.
By being mindful of these environmental factors, you can create stunning, durable designs that not only reflect your unique style but also withstand the trials of various playing conditions. Customizing your approach based on the weather ensures that your discs are not just visually appealing but also practical for the exciting world of disc golf.
Showcase: Inspiring Disc Designs from the Community
In the vibrant world of disc golf, creativity knows no bounds, and this is especially true when it comes to designing custom-painted discs. Community members across the globe have embraced the art of disc painting, creating stunning and unique pieces that reflect personal style as much as they enhance play. From elaborate landscapes to minimalist designs, the variety of artwork showcases the ingenuity and passion of this growing sport.
One standout example is the intricate mandala designs that some artists have adopted. These patterns not only catch the eye on the course but also demonstrate a high level of skill and patience in their execution. Using stencils and fine brushes, artists can create a breathtaking mandala that transforms an ordinary disc into a work of art. Moreover, discs featuring nature-inspired themes, such as forest scenes or ocean waves, pay homage to the outdoor setting of the sport, connecting players with their environment even as they focus on their performance.
Another inspiring trend in disc design is the use of vibrant colors and gradients. Artists experimenting with techniques like airbrushing can create seamless transitions that are visually captivating. These stunning effects not only make the discs stand out but can also influence their visibility during play, helping players track their discs easily against various backdrops. Furthermore, some designs incorporate personal motifs or quotes, adding a layer of meaning that resonates with the owner’s individual journey in the sport.
To encourage others in their creative endeavors, consider joining online communities and local groups that share and celebrate disc artistry. Social media platforms and forums serve as excellent venues for connecting with experienced painters who are eager to share tips and inspiration. Participating in community events and competitions centered around disc design also offers opportunities to showcase your work and gain feedback from seasoned artists. In doing so, you’ll not only contribute to your local disc golf culture but also elevate your skills and artistic vision in this dynamic sport.
Ultimately, the beauty of painting disc golf discs lies not only in the artistic expression it offers but also in the sense of camaraderie and joy it fosters among players. Every painted disc is a personal statement that adds an exhilarating element to the game, encouraging players to embrace their creativity and individuality on the course.
Maintaining Your Painted Discs: Care and Storage
To ensure your beautifully painted discs remain in pristine condition, proper care and storage are essential. Painted discs can be susceptible to scratches, fading, and other forms of damage if not handled correctly, which can detract from their artistic appeal and performance attributes. Here are practical tips to help protect your investment and keep your artistry shining through.
Care Tips for Painted Discs
- Clean Gently: Use a soft cloth or sponge dampened with water to wipe down your discs after each use. Avoid abrasive materials that can scratch the surface or damage the paint. If necessary, a mild soap solution can be used, but rinse thoroughly to prevent soap residue.
- Avoid Direct Sunlight: Prolonged exposure to sunlight can lead to fading and discoloration of your designs. Store your discs in a cool, shaded place whenever possible-especially if you don’t plan to use them for an extended period.
- Handle with Care: Always grab the disc by its edges rather than the face to prevent smudges or fingerprints. When storing or transporting multiple discs, layer them with protective dividers or wrap them in soft cloths.
Storage Solutions
Proper storage is just as important. Here are a few recommendations for keeping your painted discs safe when not in use:
- Disc Golf Bags: Invest in a quality disc golf bag with padded compartments specifically designed to protect your discs. Many bags include extra padding and custom fits to ensure discs don’t knock against each other.
- Display Cases: If you want to showcase your artwork, consider transparent display cases that protect from dust and UV light while allowing your designs to be seen.
- Shelf Space: When stacking discs on a shelf, use flat mats or lined boxes to prevent them from sliding or falling, which could lead to chipping or other damage.
Incorporating these care and storage practices into your routine will help maintain the vibrant looks and performance of your painted discs for years to come, allowing you to express your creativity without compromising your gear’s longevity. Celebrate your artistic craftsmanship by giving your discs the protection and respect they deserve, ensuring they continue to impress both on the course and off.
Exploring the Art of Disc Golf: Community Events and Competitions
In the vibrant world of disc golf, community events and competitions serve not only as a platform for athletes to showcase their skills but also as an opportunity for artists and enthusiasts to display their creativity through custom-painted discs. These gatherings celebrate the unique blend of sport and art, often featuring contests for the most creative designs alongside traditional gameplay. Whether you’re a seasoned player or a newcomer, participating in or attending these events can deepen your appreciation for the sport while inspiring your own artistic endeavors.
One notable aspect of these events is the growing trend of custom disc painting competitions, where participants are encouraged to bring their unique designs to life. Artists utilize a variety of techniques, employing paints and finishes that enhance both the visual appeal and performance of their discs. This convergence of creativity and competition not only highlights individual talent but also fosters a sense of community among artists. Many events even include workshops, providing attendees with hands-on guidance on painting techniques tailored to disc golf, ensuring that both novices and experienced painters can expand their skills.
Moreover, community events often feature showcases where artists can present their painted discs, allowing for direct interaction and feedback. This atmosphere of collaboration and sharing knowledge enriches the disc golf culture, motivating budding artists to explore their creativity further. Local disc golf clubs frequently sponsor these gatherings, promoting a vibrant exchange of ideas and inspiration. Enthusiasts often leave these events with a renewed passion for both the sport and the art of disc golf, equipped with new techniques and a network of fellow artists.
In addition to competitions and showcases, many disc golf leagues and tournaments now include themed events, encouraging participants to paint their discs around specific motifs or concepts. These themes can range from seasonal motifs to iconic local landmarks, creating a rich tapestry of designs that reflect the diversity of the community. For those looking to engage with this artistic side of disc golf, seeking out local events or even starting your own can be an excellent way to connect with other players and artists, while exploring the boundless creativity that this growing sport promotes.
Advanced Techniques: Airbrushing and Stenciling for Discs
Advanced painting techniques can elevate your disc golf discs from standard to stunning, and airbrushing along with stenciling is at the forefront of this artistic revolution. Using airbrush techniques allows for smooth gradients and intricate designs that would be difficult to achieve with traditional brushes. When paired with stenciling, you can achieve striking patterns and detailed imagery that stand out on the course. This combination not only enhances the aesthetic appeal of your discs but also showcases your unique style and personality as a player.
To begin with airbrushing, it’s essential to select the right equipment. A dual-action airbrush gives you control over both airflow and paint flow, making it ideal for creating varied textures and layers. For best results, use acrylic paints specifically designed for use with airbrushes. These paints offer a fine consistency that smoothly sprays without clogging your equipment. Preparation is crucial: ensure your disc surface is clean and primed, which can often be done with a light sanding and cleaning solution. Once set up, practice your technique on scrap material before applying it to your disc, focusing on controlling the distance and angle of the spray to create even coats.
Incorporating stencils into your design offers an easy method to add complex details. You can buy pre-made stencils or create your own using adhesive vinyl, which can be cut into intricate shapes. To apply a stencil, lay it flat against the disc, securing it with low-tack tape to prevent any lifting during painting. Lightly airbrush over the stencil, slowly building up the color to avoid overspray. For sharper images, consider using a stippling technique with a sponge or brush around the edges of the stencil, which helps define the design without the risk of bleeding paint under the stencil.
Furthermore, the community often shares inspiration through platforms like Instagram or local events, which showcase extraordinary examples of disc designs. By experimenting with various stenciling shapes and airbrush techniques, artists can reinvent their style continuously. Remember, practice is key-embracing trial and error will help you refine your approach and develop signature designs that reflect your passion for the sport. Whether you aim for a simple pattern or a complex illustration, mastering these advanced techniques can transform your discs into true works of art that also serve your gameplay needs.
Frequently Asked Questions
Q: How can I ensure the paint adheres well to disc golf discs?
A: To ensure proper paint adhesion, clean the disc thoroughly with soap and water, then use rubbing alcohol to remove any residue. A layer of primer can also help, especially if you’re using acrylic paints. Choose the right primer designed for plastics to maximize durability.
Q: What are the best types of paint for customizing disc golf discs?
A: The best paints for customizing disc golf discs are acrylic paints, specifically those designed for plastics, as they offer vibrant colors and durability. Additionally, spray paints made for outdoor use can provide a smooth finish. Ensure all paints are waterproof for longevity.
Q: How can I create custom stencils for painting discs?
A: You can create custom stencils by printing your desired design on stencil material or cardstock. Cut out the design carefully with a hobby knife, ensuring sharp edges. Place the stencil on the disc and secure it to avoid paint bleeding, allowing for more intricate designs.
Q: What techniques can I use for blending colors on my disc?
A: To blend colors on your disc, layer paints while they are still wet for a smooth transition. Use a sponge or brush to mix colors directly on the disc. For advanced effects, consider using an airbrush to achieve professional-quality gradients and blends.
Q: How long should I let the paint cure before using the disc?
A: It’s recommended to let the paint cure for at least 24 to 48 hours before using the disc. This drying period allows the paint to adhere properly and reduces the risk of chipping or smudging during gameplay. Follow up by sealing your design to protect it.
Q: What should I avoid when painting disc golf discs?
A: Avoid using oil-based paints and any products that aren’t specifically made for plastics, as they may not adhere well and can cause damage. Also, steer clear of painting discs on windy days, as dust and debris can impact your design.
Q: How can I fix mistakes or touch up my painted discs?
A: To fix mistakes, lightly sand the area with fine-grit sandpaper, clean it, and apply additional paint to cover flaws. For touch-ups, use a fine brush for precision. If the mistake is significant, consider repainting the entire section for a polished look.
Q: Are there specific design ideas that work better for visibility on the course?
A: Yes! Designs with bright colors and bold patterns are more visible on the course. Consider using fluorescent paints or contrasting colors. Adding unique designs not only helps with visibility but also allows for personal expression while playing.
For detailed techniques and more on materials, visit our sections on Essential Materials and Creative Design Ideas in the main article! Explore your creativity and improve your game today!
Key Takeaways
Now that you’re equipped with creative tips on how to paint your disc golf discs, it’s time to unleash your imagination! Customizing your discs not only enhances their visual appeal but can also influence their flight characteristics. Don’t wait-grab your materials and start designing today!
If you’re looking for more ways to enhance your disc golf experience, check out our guides on the best disc golf disc types and how to improve your throwing mechanics. For those who want to dive deeper into the community aspect of the sport, explore stories from fellow players that highlight their journeys and techniques.
We’d love to hear from you! Share your painted disc designs in the comments below or tag us on social media. For ongoing tips and resources, consider signing up for our newsletter. Keep exploring and elevating your disc golf game-the next level is just a stroke away!