In a world where minimalism meets creativity, creating your own baskets not only adds a personal touch to your home but also saves you money. Homemade baskets are versatile, practical, and can be tailored to fit any style or need, all while being budget-friendly. Whether you’re looking to organize your space, create unique gifts, or indulge in a new hobby, DIY basket-making allows you to express your individuality while being resourceful. Plus, the satisfaction of crafting something by hand is unmatched! In this guide, we’ll explore easy-to-follow plans and tips that cater to beginners and seasoned crafters alike, ensuring you have the tools to create beautiful baskets that enhance your living space. So, let’s dive into the world of homemade baskets and discover the joy of crafting together!
Homemade Basket Design Basics for Beginners
Creating your own homemade baskets can be a delightful and rewarding endeavor, especially for beginners eager to dive into DIY projects. Basket weaving offers not only a chance to express creativity but also the opportunity to craft functional items that can be used around the home or gifted to loved ones. To start, it’s important to consider the basics of design, which include understanding the shapes and structures common to baskets, as well as the types of closures and handles that can be incorporated.
One fundamental aspect to keep in mind is the use of symmetry and balance in basket design. This means that regardless of the style you choose, the shape should feel stable and visually appealing. Begin by sketching your idea, focusing on whether you want a round, rectangular, or more organic shape. For beginners, simple designs with fewer materials tend to be less intimidating and there’s a lot of beauty in their simplicity.
Materials also play a crucial role in your basket-making project. While traditional options like wicker or reeds are lovely, many modern DIYers are exploring alternatives such as fabric strips, rope, or even recycled items to create unique textures and appearances. Selecting materials that are easy to work with will make the process more enjoyable and lead to a sense of accomplishment. Experimenting with different materials can also help you develop your style and techniques as you grow more confident in your basket-making skills.
Ultimately, whether you’re crafting for decoration, storage, or gifts, start with an open mind and see where your creativity takes you. Embrace the learning process and remember that even simple baskets can showcase your personal touch. With practice and experimentation, you will find your own rhythm and style in the art of basket weaving.
Popular Materials for DIY Baskets
Crafting your own baskets opens up a world of creative possibilities, and the choice of materials can significantly impact both the aesthetics and functionality of your projects. Different materials not only bring unique textures and colors to your baskets but also cater to various skill levels and design aspirations. Whether you’re a novice or an experienced crafter, understanding the popular options available will enhance your basket-making journey.
Natural fibers, such as wicker, rattan, and reed, are traditional choices known for their versatility and structural integrity. Wicker, for instance, consists of flexible plant stems that can be easily woven into intricate patterns, making it ideal for those seeking a classic look. Alternatively, sisal and jute twine can be used for a rustic touch, adding an earthy charm to your creations. For beginners, these materials are not only forgiving to work with but also provide a sturdy foundation for your designs.
In recent years, the DIY community has embraced non-traditional materials that are both budget-friendly and eco-conscious. Fabric scraps, such as old sheets or leftover upholstery, can be turned into colorful, textured baskets. Simply cut them into strips and weave or coil them into shape. Another innovative option is to use recycled cardboard or plastic, which can create lightweight and easily customizable vessels. This not only allows for a myriad of designs but also promotes sustainability, as you’ll be giving new life to materials that would otherwise end up in a landfill.
For those looking to experiment, craft rope, such as cotton or nylon, can be a fun addition, providing a sturdy base for more structured baskets. Combining different materials, like attaching fabric accents to a rope base, can create visually interesting pieces that reflect your personal style. As you explore these options, stay open to trying mixed media, which can lead to unique results that showcase your creativity and innovation.
Ultimately, the beauty of DIY basket making lies in the diverse materials available and the endless possibilities they present. Whether you choose to stick with classic natural fibers or venture into the realm of upcycled goods, embracing a variety of materials will not only enrich your crafting experience but also help you create stunning, functional pieces that tell your own story.
Step-by-Step Guide to Crafting Your Basket
Crafting your own baskets can be a fulfilling and enjoyable hobby, combining creativity with practical skills. Whether you’re a complete novice or looking to refine your craft, this step-by-step guide will walk you through the process of creating beautiful and functional baskets using budget-friendly materials.
Begin by gathering your supplies. For a basic basket, you’ll need some flexible yet sturdy materials. If you’re opting for natural fibers, choose wicker or reed. For a more budget-friendly approach, consider using fabric scraps or recycled cardboard. You’ll also require scissors, glue (if using fabric or cardboard), and optionally, some crafting rope for additional structure.
Step 1: Prepare Your Base
Start by cutting your chosen material into strips or lengths suitable for weaving. If you’re using fabric, aim for strips about 1 inch wide. For paper or cardboard, wider strips help maintain structure. Lay out your foundation by arranging vertical pieces to form the base of your basket. Ideally, you’ll want these to be evenly spaced to ensure stability.
Step 2: Weaving Techniques
Next, it’s time to weave. Take a strip of your material and start weaving it over and under the vertical pieces. Continue this pattern, tightening each strip snugly as you go to create a solid structure. Don’t be afraid to experiment with your weaving pattern; alternating the direction can add visual interest. For a straightforward design, keep it consistent for the base and gradually change designs as you rise to the sides.
Step 3: Shaping and Finishing
As your basket grows, you’ll begin to shape the sides. You can gently bend the vertical stakes outward to form the desired shape of your basket. Once your basket reaches the desired height, secure the ends by tucking them back into the weave or cutting them and gluing them neatly.
To finish, consider adding decorative elements. Decorative ribbons, painted patterns, or additional fabric touches can enhance the appearance of your basket. If you’ve used fabric strips, a simple fringe or ruffled edge can lend a lovely flair.
Creating your own homemade baskets not only allows for personal expression but also results in unique functional pieces that are sure to impress. With patience and practice, you can produce stunning baskets that serve as organizers, gifts, or beautiful decor throughout your home. Enjoy the process, and don’t hesitate to share your creations with fellow crafting enthusiasts for added inspiration!
Creative Decorating Ideas for Homemade Baskets
Transforming your homemade baskets into unique and eye-catching pieces is not only fulfilling but also a wonderful way to express your personality and creativity. Decorating your baskets can enhance their functionality while also making a stylish statement in your home. From simple embellishments to intricate designs, there are countless ways to personalize your creations.
One effective method to decorate your baskets is by using fabric scraps or old clothes. By cutting these into strips or patches, you can create a patchwork effect that adds texture and color. This is especially beneficial for fabric-based baskets, allowing you to evoke a cozy, rustic vibe. Consider using stencils or fabric paint to add patterns or inspirational quotes directly onto the basket. This customization makes each piece truly one of a kind and can be tailored to suit any occasion, such as festive designs for the holidays.
Incorporating natural elements can also enhance your basket’s charm. Dried flowers, twigs, or even decorative moss can be woven into or affixed to your basket to introduce an organic feel. This not only beautifies the basket but can also tie it into the surrounding decor, especially if used as a centerpiece or home accessory. Using jute twine or ribbons to add borders or accents can give your baskets a more polished look; opt for earthy tones for a natural aesthetic or vibrant colors for a playful touch.
Additionally, don’t shy away from upcycling! Old materials can be transformed into charming decor. Consider using old jewelry to create embellishments or repurposed buttons to add a quirky twist. You can even add a coat of glitter or shellac to give your baskets a shimmering finish. These creative touches not only elevate your basket’s appearance but also tell a story of sustainability and resourcefulness, showcasing your commitment to creativity and environmental awareness.
Engaging in basket decoration allows for endless creativity and exploration. Whether it’s through the use of vivid colors, eclectic patterns, or natural materials, adding your personal touch can truly make your homemade baskets stand out. Make your baskets functional and decorative while enjoying the process of crafting and expressing your individuality.
Unique Patterns and Styles to Try
Crafting unique baskets not only showcases your artistic flair but also transforms ordinary materials into delightful, functional pieces. Embracing different patterns and styles can elevate your DIY projects, allowing you to express creativity while keeping costs low. From weaving techniques to playful designs, here are some imaginative approaches to consider.
One great way to experiment is through varied weaving patterns. For instance, the traditional over-under basket weave can be embellished with additional textures by varying materials. Incorporating strips of fabric or colorful yarn amidst the natural fibers can create a striking visual effect. In contrast, a spiral weave, where strands are twisted together in a circular motion, adds depth and uniqueness to your basket. This technique works particularly well with soft materials like fabric scraps or raffia, creating a vibrant, eye-catching piece.
Adding geometric designs can also set your baskets apart. Use painters’ tape or stencils to create crisp lines and shapes with fabric paints. A chevron or herringbone pattern can radiate a modern vibe, turning simple baskets into stylish décor. Another creative method is to alternate colors in a striped pattern; this not only adds dynamism but also allows you to customize the look according to your home’s color scheme.
Natural Inspirations
Drawing inspiration from nature can guide unique designs as well. Incorporating motifs like leaves, flowers, or even woodland animals can enhance the basket’s aesthetic. For instance, using dried leaves or pressed flowers to decoupage onto the surface can offer a rustic charm, while twigs or branches can be woven into the design for a more organic feel. This approach not only beautifies your creation but also tells a story of your surroundings and personal connection to nature.
Don’t forget about the use of upcycled materials! Old newspaper, magazines, or even scrap paper can be rolled and woven into beautiful shapes, creating environmentally-friendly baskets. This technique not only saves money but also encourages sustainability. Pairing upcycled materials with straightforward sewing or braid techniques can yield impressively intricate designs that are perfect for functional use or decorative display.
In conclusion, exploring various patterns and styles not only enhances the aesthetic of your homemade baskets but also makes the crafting process enjoyable and fulfilling. By employing different materials and techniques, you can create pieces that are not just practical but also reflect your unique artistic journey. Dive into these ideas, experiment with textures and colors, and watch as your simple DIY projects blossom into stunning handcrafted baskets.
Budget Tips for Cost-Effective Basket Making
Crafting beautiful baskets doesn’t have to break the bank! With a little creativity and knowledge of budget-friendly materials, you can create stunning pieces that not only serve practical purposes but also express your unique artistic flair. One of the best strategies is to start with materials you already have around the house. For instance, old fabric scraps, twine, and even cardboard can be repurposed into unique basket designs. Consider exploring local thrift stores or garage sales for undervalued items, such as old baskets that can be refurbished with a fresh coat of paint or new weaving.
Additionally, shopping for materials in bulk can substantially reduce costs. Many craft stores offer discounts when you buy larger quantities, and it also means you’ll have plenty of supplies for future projects. Look for seasonal sales or clearance items, especially during holiday seasons when craft materials are abundant. Joining local crafting groups, both online and in your community, can also open doors to material swaps or bulk purchasing options.
Another effective way to keep costs low is by utilizing natural materials from your surroundings. If you’re in an area with abundant plant life, consider gathering branches, reeds, or grasses to weave into your baskets. Not only does this method save money, but it gives your creations a connection to the environment, adding a touch of rustic charm.
Lastly, don’t underestimate the power of online resources. Many tutorials and free patterns available online can inspire and guide you through creating baskets from cost-effective materials. Embracing a DIY mindset, where you prioritize creativity over spending, can turn basket making into an enjoyable and fulfilling hobby that fits within your budget. So gather your materials, and let your imagination run wild!
How to Personalize Your Baskets for Gifting
Creating personalized baskets for gifting is not just a thoughtful gesture; it transforms a simple item into a cherished keepsake. Personal touches can elevate your handmade baskets from ordinary to extraordinary, ensuring they resonate deeply with the recipient. Think about their interests and preferences when designing your basket. Incorporating elements that speak to their personality or needs not only shows deep consideration but also makes your gift feel unique.
Consider adding a personal note or card that reflects your relationship with the recipient. A heartfelt message can accompany the basket’s contents, adding a layer of intimacy to your gift. You might also choose to theme your basket around a special occasion or interest, such as a cozy movie night, a gardening kit, or a spa retreat. For example, fill a basket with popcorn, a favorite movie, and some homemade snacks for a movie lover, or compile gardening tools and seed packets for a gardening enthusiast.
Another creative way to personalize is through decoration. Use colors, patterns, and textures that the recipient loves. You could paint or stain your basket in their favorite color, or line the inside with fabric that has a pattern they are fond of. To make it even more special, consider adding embellishments like handcrafted tags, charms, or seasonal decorations. This not only enhances visual appeal but also makes the basket a decorative piece that they might want to keep long after its initial use.
Lastly, think about the contents of the basket. Include items that reflect the recipient’s hobbies or interests. If they love to bake, add measuring spoons, cookie cutters, and a favorite recipe. For someone who enjoys crafting, you could include various supplies tailored to their craft. By curating the contents thoughtfully, you ensure the basket serves as a practical and heartfelt gift, leaving a lasting impression while embodying your effort and creativity.
Upcycling: Turn Old Items into Beautiful Baskets
Transforming old items into beautiful baskets is not only an eco-friendly choice but also a creative way to express your personality while saving money. Many everyday objects can be reimagined into functional and stylish storage solutions. You can easily create unique baskets from old newspapers, magazines, or fabric scraps, infusing character and charm into your home.
Consider starting with materials you likely already have at home. For instance, newspaper woven baskets can be made by rolling strips of paper and weaving them together. Not only does this method repurpose an item that typically ends up in recycling, but it also produces a lightweight and customizable basket perfect for holding lightweight items. Similarly, fabric remnants or outgrown clothing can be cut into strips and braided or woven into eye-catching baskets, creating a soft texture and vibrant colors tailored to your aesthetic.
To take your upcycled baskets to the next level, try incorporating embellishments or mixed media. A simple cardboard box can be wrapped in twine or fabric, providing a rustic charm while holding your everyday essentials. For a fun twist, add buttons, beads, or even ribbons to personalize your upcycled creation. Not only do these small details enhance the basket’s visual appeal, but they also offer a functional way to incorporate personal style into your décor.
When creating these baskets, keep in mind the intended use. If you envision using your basket for storage, consider adding a liner made from old fabric to protect it and provide a decorative touch. For a more whimsical approach, embellish your upcycled pieces with painted designs or stenciled patterns that match your home’s color scheme. You can also group several small baskets together to create a cohesive and organized storage system while adding a splash of creativity to your space. By letting your imagination run wild and utilizing items you’d typically discard, you can craft stunning baskets that are both beautiful and functional.
Advanced Techniques for Experienced Crafters
Creating stunning baskets doesn’t just stop at basic weaving techniques; it opens up a world of advanced skills that allow experienced crafters to showcase their artistry and push the boundaries of traditional basket making. For those eager to elevate their projects, blending various materials and weaving techniques can produce intricate designs with depth and character. Picture combining the rigidity of wicker with the softness of fabric strips to create a basket that is not only visually striking but also uniquely functional.
Mixed Media Mastery
One fascinating approach for seasoned crafters is mixed media basket-making. This technique involves incorporating diverse materials such as natural fibers, plastics, and recycled items. Consider integrating unconventional items like rope, old jewelry, or metal accents into your weaves. By manipulating the thickness, texture, and color of these materials, you craft baskets that attract attention and tell a story. For instance, wrapping fabric around a metal frame not only provides strength but also invites personal expression through color and pattern choices.
Complex Weaving Patterns
As you move into more sophisticated techniques, exploring advanced weaving patterns will significantly enhance your basket’s appeal. Techniques such as coiling, twining, or even plaiting can add complexity. In coiling, instead of weaving flat, you’ll create a continuous spiral, which can be manipulated into various shapes. Twining, involving intertwining two or more strands, can create intricate designs that play with light and shadow. To get started, practice with a smaller coiling project-like a small bowl-to refine your skills before moving on to larger baskets.
Adding Personal Touches
Personalization can also take your baskets to the next level. Embrace techniques like dyeing your materials or using stencils and stamps for decoration. Experiment with natural dyes made from plants to achieve colors that resonate with your style and the environment. Additionally, consider adding functional features like lids or handles that are not just practical but also enhance the overall aesthetic of your basket. Be sure to explore traditional motifs or patterns that reflect your heritage or artistic preferences; this not only adds value but makes your creations unique.
By integrating these advanced techniques into your basket-making repertoire, you not only hone your craft but also invite a fresh perspective into an enduring art form. As you experiment and innovate, the opportunities for personalization and creativity are limitless, ensuring your baskets stand out as tokens of your unique craftsmanship.
Organizational Uses for DIY Baskets
Transform your space and streamline your organization with homemade baskets, which not only enhance aesthetics but also provide functional solutions for clutter management. DIY baskets can be tailored to fit any space in your home or office, making them versatile tools for keeping your environment tidy and stylish. Whether you’re organizing toys, crafting supplies, or office materials, handcrafted baskets can serve a myriad of purposes that complement your interior design while providing a practical storage solution.
Versatile Storage Solutions
Baskets can be created in various sizes and shapes, allowing you to address different organizational needs effectively. For example, a larger woven basket can be ideal for storing blankets or laundry, while smaller baskets work well for holding remote controls, stationery, or small electronics. Consider creating a cohesive look by using multiple baskets of similar materials or colors to unify a space. This approach enhances not only the functionality of your storage but also the overall visual appeal of your room.
Creative Application Ideas
Utilizing baskets creatively can help overcome common storage dilemmas. Hang shallow baskets on walls to display plants or décor items, effectively adding vertical interest to your space. Nesting baskets can also save space while providing a neat, organized look. Another creative use involves labeling your baskets, turning them into stylish yet practical storage solutions that make it easy to find what you need without rummaging through clutter. Think about incorporating decorative elements like fabric liners in contrasting patterns or colors that match your home’s style.
Specialized Baskets for Different Needs
Imagine baskets specifically designed for distinct purposes: a basket designated for kids’ toys can have fun colors and patterns, while a sturdy basket for the garage can be made from more rugged materials to withstand wear and tear. Categorizing your items helps maintain order, making it easier for everyone in the household to return items to their rightful place. On a budget, common materials such as old newspapers, fabric scraps, or even repurposed cardboard can be transformed into eye-catching and functional storage solutions.
Incorporating homemade baskets into your organization strategy not only alleviates clutter but also showcases your personal style and creativity. With thoughtful design and planning, these charming storage options can efficiently utilize space while adding a personal touch to your home décor. Embrace the art of DIY basket-making and watch as your home transforms into a haven of organization and style!
Inspiration: Showcase Your Finished Baskets
Showcasing your completed baskets can be an exhilarating experience, bursting with creativity and personal expression. Transforming ordinary materials into charming and functional pieces not only highlights your crafting skills but also beautifies your space. To inspire others and celebrate your handiwork, consider the various ways to present your finished creations both in your home and within your crafting community.
One effective way to showcase your baskets is through dedicated display areas in your home. Arrange your baskets on open shelves, hang them on walls, or use them as centerpieces on tables. When organizing your display, group baskets of similar sizes or colors to create a cohesive look that draws the eye. Hanging baskets can serve dual purposes; they organize your space while also acting as artful statements. For instance, a collection of colorful, handwoven baskets in various sizes can transform a bare wall into a stunning gallery that adds depth and character to your room.
Furthermore, sharing your creations on social media platforms or crafting forums can connect you with a like-minded community. Take clear, well-lit photos of your baskets in use-perhaps filled with seasonal décor or as gift baskets for friends and family. This not only provides inspiration to others looking to embark on their own DIY projects but also fosters a supportive environment where ideas and techniques can be shared. Consider using popular craft hashtags to reach a wider audience and encourage feedback and interaction.
Lastly, consider hosting a local craft showcase or participating in community craft fairs. This gives you an opportunity to display your baskets to a broader audience while potentially selling your creations. Set up an attractive booth with your best pieces and include informational cards detailing your crafting process, the materials used, and the inspiration behind each design. This personal touch can resonate with attendees and may lead to future custom orders or collaborations. By sharing your finished baskets, you not only celebrate your journey as a crafter but also inspire others to explore their own creativity.
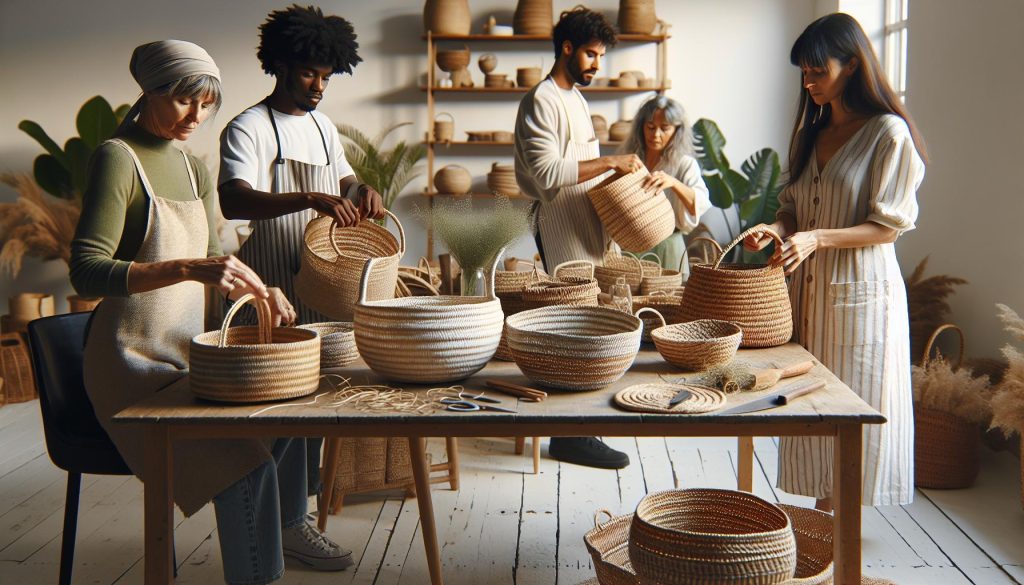
Community Stories: Success with Homemade Baskets
Creating homemade baskets is not just a creative outlet; it can lead to a rewarding and community-focused experience. Many crafters have found success not only in their crafting skills but also in how they connect with others through their handmade creations. Whether you’re a seasoned pro or just starting, the stories of fellow enthusiasts can inspire you to take your basket-making journey to new heights.
One inspiring example comes from Sarah, a passionate crafter from a small town who turned her love for basket weaving into a community initiative. Sarah began hosting weekend workshops at her local community center, where she shared her skills with novices and experienced crafters alike. The low-cost workshops emphasized budget-friendly materials and techniques, showing participants how to repurpose old newspapers and fabric scraps into beautiful baskets. Today, Sarah’s classes have grown into a vibrant community gathering space where people share ideas, celebrate successes, and even collaborate on projects.
Similarly, many crafters have embraced social media to showcase their work and share their experiences. Instagram and Facebook groups dedicated to DIY basket making have become invaluable resources for inspiration. These platforms allow individuals to post their finished products, ask for advice on techniques, and suggest cost-effective material sources. For instance, one group recently held a challenge encouraging members to create baskets using only items found in thrift stores. The results were not only impressive but also deeply fulfilling, highlighting creativity and sustainability in basket making.
Engaging with the local community extends beyond workshops. Craft fairs and farmer’s markets have provided crafters with opportunities to showcase and sell their homemade baskets. Elena, a former school teacher, started selling her unique, eco-friendly baskets at local markets with great success. She found that sharing her story-in how each basket was made and what materials she used-helped her connect with customers who valued the craftsmanship and care behind each piece. This not only boosted her sales but also fostered a loyal customer base passionate about supporting local artisans.
The success stories of homemade basket makers illustrate that this craft can forge connections, empower individuals, and create a sense of belonging. By sharing techniques, participating in workshops, and showcasing creations, crafters build a supportive community that celebrates creativity and sustainability. So whether you’re making baskets for personal use, gifts, or as part of a budding small business, remember that the journey is as important as the final product-so share your story and inspire others along the way!
Frequently Asked Questions
Q: What are the best materials for making budget-friendly homemade baskets?
A: The best materials for budget-friendly homemade baskets include recycled paper, old fabric, and natural fibers like jute or sisal. You can also use cardboard boxes or plastic containers as a base. Exploring common household items not only saves money but also promotes upcycling.
Q: How can I personalize my homemade baskets for special occasions?
A: Personalize your baskets by adding custom decorations like painted designs, ribbons, or monogrammed tags. You can also fill them with themed items that reflect the occasion, such as gifts for a birthday or holiday decor. Check the section on how to personalize in your article for more ideas!
Q: What are some beginner-friendly techniques for weaving baskets?
A: Beginner-friendly techniques for weaving baskets include simple over-and-under patterns using materials like paper strips or fabric. Start with a basic round or square base, then gradually experiment with different shapes as you gain confidence. Detailed weaving instructions can be found in the crafting guide of your article.
Q: Can I make homemade baskets using items I already have at home?
A: Yes, you can definitely create homemade baskets using items you already have at home. Old magazines, newspapers, and fabric scraps can be transformed into beautiful baskets. This not only saves money but also enhances creativity through upcycling.
Q: What are some creative decorating ideas for homemade baskets?
A: Creative decorating ideas for homemade baskets include wrapping them in twine, adding decorative papers, or using stencils and paint to create patterns. You can also line baskets with fabric for a more polished look-explore the decorating section in your article for more detailed suggestions.
Q: How do I maintain the shape of my homemade baskets?
A: To maintain the shape of your homemade baskets, use a sturdy base like cardstock or plastic. Soaking natural fibers before weaving can also help them hold their shape better. Make sure to allow your baskets to dry fully in a well-ventilated area after crafting.
Q: When is the best time to start a DIY basket-making project?
A: The best time to start a DIY basket-making project is during the off-season of cleaning and organizing, such as spring or fall. These times are perfect for using up materials you already have while preparing for home organization or gifts for upcoming celebrations, as detailed in your budget tip section.
These FAQs not only address common user queries but also invite readers to explore other sections of your article for additional information. Happy crafting!
In Summary
Thank you for exploring “Homemade Baskets: Budget-Friendly DIY Plans.” We hope you’re inspired to create your own beautiful and functional baskets that fit your style and budget! Remember, these plans not only allow you to engage in a rewarding DIY project, but they also help you save money while adding a personal touch to your home decor. Don’t wait-gather your materials and start crafting today to enjoy the satisfaction of handmade creations!
For more creative DIY projects, check out our guides on Transforming Everyday Items into Unique Decor and Budget-Friendly Crafting Ideas. If you have any questions or need tips on your basket-making journey, leave a comment below-we’d love to help! Remember to sign up for our newsletter for more exciting updates and projects. Let’s keep crafting together and inspire each other in this wonderful community!