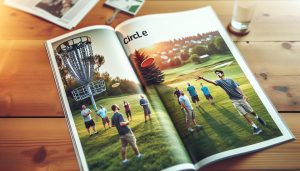
Did you know that disc golf is one of the fastest-growing sports in the world? Whether you’re a seasoned player or just stepping onto the course, having your own disc golf basket can enhance your practice sessions and backyard fun. In this DIY guide, we’ll walk you through the essential steps to create your own disc golf basket, saving you money while allowing you to customize your design to meet your needs. Building a basket not only helps improve your skills but also fosters a deeper connection with the sport, encouraging you to spend more time outdoors with friends and family. So grab your tools and get ready to embark on a rewarding project that brings the joy of disc golf right to your home!
Choosing the Right Materials for Your Disc Golf Basket
is crucial for durability, performance, and functionality. A well-constructed basket will withstand the elements and daily wear while providing a reliable target for players. The material choices can vary widely, affecting not only the longevity of the basket but also its visual appeal and stability during play.
One of the most popular materials for the main structure of a disc golf basket is metal, particularly galvanized steel. This choice offers strength and corrosion resistance, making it ideal for outdoor use. Steel baskets typically have a solid core, which enhances stability against strong winds and rough handling. Additionally, the metal can be painted or coated to reduce rust and provide an aesthetic look that blends with the surrounding environment. While heavy, they can be anchored securely, ensuring they stay in place.
Another notable option is plastic, especially in portable baskets designed for easy setup and takedown. High-density polyethylene (HDPE) is often used in these cases, as it is lightweight and resistant to fading or cracking. These baskets are typically less stable in windy conditions compared to their metal counterparts, but they serve well for casual play and practice sessions.
When building your own basket, consider using wood or composite materials for aesthetic customizations or unique designs. While these options can require more maintenance and may not withstand the elements like metal or plastic, they provide opportunities for creativity and personalization. If opting for wood, ensure it is treated to resist weathering and decay.
Additionally, hinges and connectors should be made from rust-resistant materials, such as stainless steel or high-grade plastic. These parts play a crucial role in the assembly and longevity of the basket, ensuring all components stay securely in place during play.
Ultimately, the material you choose will depend on your budget, intended use (casual vs. tournament play), and personal style preferences. Selecting the right combination of materials can lead to a high-quality, functional, and attractive basket that enhances your disc golf experience.
Step-by-Step Guide to Building a DIY Disc Golf Basket
Building your own disc golf basket can be an incredibly rewarding project that enhances your game while also allowing you to customize your targets to fit your style. The process can be broken down into manageable steps that ensure you not only create a functional piece of equipment but also gain a deeper appreciation for the sport.
To begin, gather your materials based on the type of basket you’d like to create, considering options like metal, plastic, or wood. Metal baskets tend to offer the best durability and stability, while portable options in high-density polyethylene (HDPE) are great for casual play. If you prefer a more personalized touch, wood can be an appealing choice, but remember it requires more maintenance. Once you have decided on materials, follow these steps:
- Base Construction: Start with a sturdy base, typically using a piece of wood or a metal plate. This base will anchor your basket to the ground, preventing it from tipping over during play.
- Create the Pole: Cut a length of metal or PVC pipe for your basket’s pole. This should be tall enough to meet tournament specifications, usually around 5 to 6 feet. Ensure it is securely attached to the base using bolts or a strong adhesive, as this will support the entire structure.
- Framing the Basket: For the main basket, you can create a circular frame using a combination of metal or heavy-duty plastic strips. Use wire or welding to connect the pieces, forming a sturdy ring that will hold the catching area.
- Mesh Construction: Attach a mesh net around the frame. A heavy-duty nylon or similar material can be used for this purpose, allowing discs to catch while preventing them from falling through. Secure this netting to the top and bottom of the frame, ensuring it has enough slack to catch discs effectively.
- Final Assembly: Once the netting is in place, finish your basket by attaching the specific features such as the inner poles or chains, which help slow the disc down as it enters. Make sure everything is tightly secured and stable.
- Testing and Adjustments: Finally, place your DIY basket in an open area and test it out. Observe if the discs catch effectively and make any necessary adjustments to the netting tension or height.
This DIY endeavor not only allows you to enjoy the satisfaction of building your own equipment but also brings a unique flair to your disc golf experience. Remember, the best baskets reflect the player’s personality and needs, so don’t hesitate to get creative!
Essential Tools You’ll Need for Disc Golf Basket Construction
To embark on your DIY disc golf basket adventure, having the right tools at your disposal can make all the difference. The construction process can be straightforward or complex depending on the design you choose, but with essential tools, you’ll set yourself up for success.
A good quality drill is crucial for making precise holes in your materials and for securing bolts. If you’re working with metal, make sure to have the appropriate drill bits to penetrate that tough surface. A saw, whether it’s a circular or hacksaw, will be necessary for cutting your poles and framing materials to size. If you’re opting for wood, a miter saw will provide clean cuts that ensure stability when assembling your basket.
When constructing the basket itself, a measuring tape and a level are indispensable. These tools will help you maintain proper dimensions and ensure that your basket is straight, which is vital for both performance and aesthetics. Additionally, a set of wrenches or a socket set will be needed for bolting pieces together securely. As you assemble your basket, having a screwdriver for both Phillips and flathead screws will come in handy for attaching mesh or chains effectively.
While you may have the basics covered, consider also incorporating a workbench for stability during the construction process. It’s worth investing in a safety kit, including gloves and goggles, particularly if you’re using power tools or working with sharp materials. By equipping yourself with these essential tools, you’ll not only streamline the construction process but also enhance the quality and durability of your custom disc golf basket.
Completing your DIY project will not only increase your appreciation for the sport but also give you a unique piece of equipment that reflects your style and passion for disc golf. Happy building!
Creative Design Ideas for Custom Disc Golf Baskets
Imagine step onto a disc golf course and spotting a basket that isn’t just functional but also an artistic expression of the sport. Customizing your disc golf basket can breathe new life into your game, turning a simple target into a landmark that represents your personal style and the spirit of the community. Whether you’re a casual player or a competitive athlete, creatively designing your disc golf basket can enhance your experience and those of your fellow enthusiasts.
One popular creative approach is to personalize the basket’s color and finish. Consider using weather-resistant paint or vinyl wraps to showcase your favorite team colors, a beloved animal, or unique patterns. This customization not only adds flair but also helps your basket stand out on the course, making it easier to spot from afar. You might also explore using different materials for the basket itself. While traditional metal and plastic are common, incorporating wood or bamboo can create a rustic charm that sets your basket apart.
In addition to aesthetic elements, think about functional designs that can improve gameplay. For example, adding adjustable chains can allow you to modify the basket’s difficulty level, catering to various skill levels. You might even experiment with the shape and height of the basket; a wider ring can catch more discs, while elevating the basket increases the challenge for players.
Furthermore, you could incorporate storage options into your design. Including hooks for bags or shelves for discs would create a convenient spot for your gear during breaks, promoting organization on the course. With endless possibilities at your fingertips, don’t hesitate to let your imagination run wild. Celebrate the sport by crafting a disc golf basket that’s not only a target for scoring but also a proud representation of your dedication and passion for the game. Happy building!
Height and Size Considerations: Making Your Basket Tournament-Ready
When crafting a disc golf basket that meets tournament standards, precise height and size specifications play a crucial role in ensuring both functionality and fairness. According to the PDGA (Professional Disc Golf Association), a tournament-ready disc golf basket should stand at an overall height of 52 inches, with the target area-a 21-inch diameter basket rim-sitting at 45 inches above the ground. This design facilitates equitable play, allowing players of varying heights to access the basket comfortably.
The construction of your basket not only needs to adhere to these height specifications, but also consider the size and weight of the materials used. A well-balanced basket enhances stability, increasing its ability to withstand adverse weather conditions and the impact of discs hitting the target. Using heavier materials for the base and lighter ones for the top can create a low center of gravity, significantly reducing the risk of tipping over during intense play. Additionally, ensuring that the basket has a minimum depth of 24 inches will provide adequate catching capability, accommodating a variety of disc flight paths and minimizing bounce-outs-a common concern among competitive players.
As you plan your build, it’s also important to consider how the height and size will affect gameplay dynamics. For instance, a lower basket can favor beginners who may struggle with longer throws, while higher baskets increase the challenge for more advanced players. By incorporating adjustable features like extendable poles, you can easily modify your basket to cater to different skill levels or to create a unique challenge for your local courses.
In summary, adhering to the official height and size guidelines while allowing for some customization can lead to a disc golf basket that not only meets tournament standards but also enhances the overall playing experience. Embrace the challenge of creating a basket that is welcoming for newcomers and competitive for seasoned players, ensuring that every round of disc golf plays out as both exhilarating and fair.
How to Properly Anchor Your Disc Golf Basket
Proper anchoring of your disc golf basket is crucial for ensuring its stability and functionality on the course. A well-anchored basket can withstand strong winds, avoid tipping during intense play, and enhance the overall playing experience. If you’re creating a DIY disc golf basket, understanding the anchoring process is key to making it durable and tournament-ready.
To anchor your disc golf basket effectively, there are a few methods you can employ, depending on the materials you choose and the conditions of the playing area. Here are some popular anchoring techniques:
- Ground Stakes: For baskets used in temporary setups or areas with softer ground, using metal stakes driven into the ground can provide a secure hold. Ensure the stakes are sufficiently long to penetrate deeply into the earth without risking them being uprooted by strong winds.
- Concrete Footing: A more permanent solution involves creating a concrete base. You can pour a small concrete slab, ensuring your basket’s pole is embedded in the center while the concrete sets. This method provides excellent stability and is ideal for public courses.
- Sandbags or Weights: If your basket is designed for portable use or you’re playing in a more transient setting, placing heavy sandbags or using weights around the base can prevent it from shifting. This is particularly useful in windy conditions.
- Adjustable Anchoring Kits: Some manufacturers offer commercial anchoring kits specifically designed for disc golf baskets. These kits often include various components to increase the basket’s stability, ideal for both temporary and permanent setups.
When selecting an anchoring strategy, consider the location and intended permanence of your basket. If it’s a permanent installation, you may opt for concrete, while a temporary basket might benefit from simple ground stakes or weights. Proper anchoring not only improves durability but also enhances the playability of your course, allowing players to focus on their game without worrying about a wobbly target. A sturdy disc golf basket can withstand the test of time and countless rounds, making your DIY project one that will serve both novice and competitive players alike.
Decorating and Personalizing Your Disc Golf Basket
One of the most exciting aspects of creating your own disc golf basket is the freedom to personalize and decorate it, making it a unique reflection of your style and character. Personal touches can transform your basket into a standout piece on the course, helping to foster a sense of ownership and pride in your DIY project. Whether you’re looking to make a statement or blend in with the natural surroundings, there are numerous creative ways to enhance your basket’s appearance.
Ideas for Personalization
Start with color-a fresh coat of paint can dramatically change the look of your disc golf basket. Use weather-resistant spray paint to ensure durability against the elements, and consider using multiple colors or patterns like stripes or polka dots for added flair. You can even paint your favorite team’s colors or a design that reflects your local culture or personal interests.
Beyond paint, think about adding decorative elements. Fabric wraps, decals, or stickers can give your basket a unique touch while also promoting local clubs or events. For a more rustic look, incorporating natural materials like twine, jute rope, or wooden accents can create a warm and inviting appearance. Secure these with water-resistant adhesive or zip ties for longevity.
Interactive Elements
Another way to personalize your basket is by adding interactive or thematic elements. For example, you could attach a small chalkboard or whiteboard where you can jot down your best scores, or even use this space to write motivational quotes. Consider seasonal themes, using decorations that change with the time of year-like flowers in spring or leaves in autumn-to keep your basket feeling fresh and in tune with the environment.
Engagement with the Community
Sharing your custom designs on social media or within local disc golf communities can spark inspiration and encourage others to decorate their baskets as well. You may even start a friendly competition among friends or local leagues that awards prizes for the most creative or visually stunning baskets. This not only enhances your enjoyment of the sport but also strengthens the sense of community that disc golf fosters.
In essence, the process of can be as rewarding as playing the game itself. It allows you to express your individuality while enhancing your playing experience. So gather your materials, unleash your creativity, and let your disc golf basket become a vibrant part of your sport!
Testing Your DIY Disc Golf Basket for Durability
Ensuring the durability of your DIY disc golf basket is crucial not only for functionality but also for your enjoyment of the game. A well-constructed basket can withstand the rigors of play while maintaining its integrity and performance over time. To test your basket effectively, begin with a series of practical evaluations that simulate actual playing conditions.
Start by examining the stability of your basket. This involves pushing gently on the structure to check for any wobbling or movement. A durable basket should stand firm without any swaying, which could affect gameplay. Next, fill the basket with a weight equivalent to several discs or use sandbags around the base to see how it holds up under added pressure. If the basket tilts or shifts, consider reinforcing the base or using better anchoring methods.
Once you’re satisfied with the stability, assess how well the materials withstand wear and tear. Conduct practical tests-throw a selection of discs from various distances and angles, ensuring that you mimic real game scenarios. Notice any strain on the basket assembly; this will help identify weak spots. Depending on the materials used, the basket should show minimal signs of damage after multiple throws.
Environmental Resistance Testing
Another key aspect of durability is how well your basket holds up to environmental conditions. If your basket is designed to be permanent, expose it to rain, sun, and varying temperatures to see how the materials react over time. For instance, if you used paint, check for peeling or fading, and ensure that all components have water-resistant properties. This could involve coating metal parts with a rust-inhibiting spray and ensuring fabric decorations are treated for UV protection.
Finally, don’t hesitate to involve your community in the testing process. Invite fellow disc golf enthusiasts for a “basket test day.” This not only allows you to gather diverse feedback but also strengthens community ties. Witnessing numerous players interact with your design can reveal performance nuances and help refine your construction before tournament play.
By rigorously testing your DIY disc golf basket against these criteria, you can ensure it performs exceptionally well during games, enhancing your playing experience and showcasing your craftsmanship on the course. Remember, a well-tested basket not only stands up to play but also contributes to the overall enjoyment of the sport.
Maintaining and Repairing Your Disc Golf Basket
To ensure that your disc golf basket remains a reliable part of your game, regular maintenance and timely repairs are essential. Like any outdoor equipment, wear and tear are inevitable, especially if your basket sees frequent play. Taking proactive steps can extend its lifespan and keep it ready for hours of enjoyable play.
One of the first aspects to check is the structural integrity of the basket. Regularly inspect joints, welds, and areas prone to fatigue. If you notice any loose parts, tighten screws or bolts immediately. Additionally, pay attention to the bottom core of the basket, which is often subjected to the most impact from discs. If the base shows signs of damage, reinforcing it with additional framing or a sturdier material can help. To prevent rust formation on metal components, ensure to periodically apply a rust-inhibiting spray.
Environmental exposure can also compromise your basket’s aesthetic and function. Harsh weather can lead to fading paint or even degradation of protective coatings. It’s wise to reapply protective coatings annually, particularly after harsh seasons. For baskets made of wood or other susceptible materials, use a sealant to protect against moisture and rot. Fabric components, if any, should be cleaned and treated with waterproofing sprays to ensure they stay intact and looking fresh.
Finally, don’t overlook the importance of cleaning your basket. A quick wipe-down can remove dirt and debris that accumulate over time. For deeper cleaning, use a mild detergent and rinse thoroughly, taking care not to damage any decorative elements. If you’re looking for a fun community activity, host a maintenance day with local players. Not only does this reinforce community bonds, but it can also serve as a group effort for maintaining multiple baskets on a course. By investing time and resources into maintenance and repair, you can ensure that your DIY disc golf basket remains an integral and reliable part of your disc golf experience for years to come.
Understanding Regulations for Disc Golf Baskets
To create a disc golf basket that meets the standards of the sport while ensuring a fun and fair experience for all players, it’s essential to understand the regulations surrounding these vital pieces of equipment. The Professional Disc Golf Association (PDGA) sets specific criteria that must be adhered to for a basket to be sanctioned in tournaments. Familiarizing yourself with these standards can give you insights into not only compliance but also functionality when designing your DIY disc golf basket.
Various aspects fall under the umbrella of regulations, from the dimensions of the basket to its overall functionality. According to PDGA guidelines:
- Overall Height: The basket must have a height of 1,200 mm (approximately 47.24 inches) from the ground to the top of the basket.
- Target Area: The target area, which consists of the bottom of the basket and the retaining chains, must be at least 1,000 mm (approximately 39.37 inches) in diameter.
- Chain Arrangement: Baskets should include a minimum of 12 evenly spaced chains, which enhance the basket’s effectiveness in catching discs.
- Material Specifications: The materials used must be durable and capable of withstanding varied weather conditions and the impact from thrown discs.
Ensuring Compliance and Functionality
Observing these regulations not only enhances your basket’s tournament eligibility but also significantly improves gameplay. Athletes and casual players alike benefit from a well-designed basket that catches discs reliably. Considering these specifications during the planning and building process will yield a structure that contributes positively to the disc golf experience.
Additionally, beyond just construction, make sure to maintain your basket according to PDGA rules. Regular checks will help ensure that it retains its target dimensions and effectively catches discs-a well-maintained basket is key for hosting tournaments and fostering a strong community of players. Understanding and adhering to these regulations will not only solidify your basket’s standing within the sport but will also elevate your disc golf game to new heights.
Where to Place Your DIY Disc Golf Basket on the Course
Finding the ideal location for your DIY disc golf basket can significantly impact the enjoyment and challenge of the course. When choosing a spot, consider not only the aesthetic but also how the environment can enhance gameplay. A well-placed basket can become a focal point, introducing unique challenges based on landscaping and terrain.
To start, look for a location that offers a mix of open space and natural obstacles. Trees, slopes, and varying terrain can add complexity to a hole, encouraging players to practice different throwing techniques. For instance, placing the basket at the edge of a clearing surrounded by trees can force players to navigate their throws strategically, testing their skills in accuracy and distance. Moreover, positioning the basket on a slight elevation can make the challenge even more engaging, as players must adjust their aim and power accordingly.
It’s essential to ensure that the path to the basket is clear from excessive underbrush and potential hazards that could impede play or cause safety concerns. Additionally, consider the wind patterns in your location. Avoid placing the basket in an area that frequently encounters strong winds, as this can lead to inconsistent results and frustration for players. Instead, seek a moderately sheltered spot that offers some protection while still allowing for fair gameplay dynamics.
Take into account the accessibility of your basket’s location for all skill levels. If you’re aiming to create a community-friendly course, make sure the area is reachable and appealing to beginners. Clear sightlines and less perilous angles will offer new players a less intimidating experience, fostering a love for the sport. Ultimately, the right placement will not only challenge seasoned players but also welcome those just starting their disc golf journey, enhancing the communal spirit of the game.
Community and Resources: Connecting with Other Disc Golf Enthusiasts
Connecting with fellow disc golf enthusiasts can greatly enhance your journey in building and enjoying your DIY disc golf basket. As you dive into this rewarding project, tapping into the collective knowledge and experiences of other players can provide invaluable insights and inspiration. Community engagement not only enriches your understanding of the sport but also expands your network, making it easier to find resources, advice, and potential playing partners.
For starters, consider joining local disc golf clubs or online forums where enthusiasts gather to share tips and ideas related to basket construction and course design. Websites such as the Professional Disc Golf Association (PDGA) and disc golf-centered social media groups are excellent platforms to engage with experienced players. Many of these communities encourage members to share their DIY projects, which can spark creativity and provide practical solutions to common challenges faced during construction.
Participating in local tournaments or disc golf events can also connect you with a wider community. These gatherings offer opportunities to see various basket designs in action, allowing you to discover what works well in different environments. Don’t hesitate to strike up conversations with other players about their favorite materials and designs, as you may glean useful tips that can make your own DIY basket stand out.
Remember, the disc golf community is known for its welcoming and friendly atmosphere. Whether you’re a seasoned player or a newcomer, your unique perspective and contributions can help foster a vibrant disc golf culture. As you share your DIY journey, you might inspire others to embark on their own projects, creating a network of enthusiastic builders and players excited to enhance the sport together. Embrace this opportunity to learn from one another, share your experiences, and ultimately, deepen your love for disc golf.
Frequently asked questions
Q: What materials are best for a DIY disc golf basket?
A: The best materials for a DIY disc golf basket include high-quality metal for the frame, durable plastic or metal for the catch zone, and weather-resistant paint for protection. Ensure to choose materials that offer both strength and flexibility to withstand outdoor conditions.
Q: How much does it cost to make a DIY disc golf basket?
A: Building a DIY disc golf basket can cost anywhere from $50 to $200, depending on the materials you select and whether you already own some essential tools. Planning your basket design carefully can help optimize costs.
Q: Why should I build my own disc golf basket?
A: Building your own disc golf basket allows for customization to fit your design preferences, provides a rewarding DIY project, and is often more cost-effective than purchasing a pre-made basket. Plus, you can create a basket tailored to your local course needs.
Q: How can I ensure my DIY disc golf basket is durable?
A: To ensure durability, use weather-resistant materials, apply protective coatings, and design for structural integrity. Regularly inspect your basket for wear and tear, especially after extreme weather, to maintain its longevity.
Q: What is the size regulation for a disc golf basket?
A: The regulation size for a disc golf basket is typically 21-25 inches in diameter for the catching area, with a height of at least 45 inches from the ground. Adhere to these specifications for tournament-ready baskets.
Q: Where should I place my DIY disc golf basket for optimal play?
A: For optimal play, place your DIY disc golf basket in a clear area with adequate space around it, avoiding obstacles like trees and bushes. Additionally, consider factors like wind direction and sun exposure to enhance gameplay.
Q: What features make a disc golf basket “tournament-ready”?
A: A tournament-ready disc golf basket includes reflective hardware, a sturdy frame, an adequate catching area, and complies with size regulations. These features ensure fair play and visibility during events, catering to competitive standards.
Q: Can I personalize my DIY disc golf basket? How?
A: Yes, personalizing your DIY disc golf basket can be fun! Use paint, decals, or themed decorations to showcase your style. Consider adding unique elements like LED lights or custom color schemes to make your basket stand out on the course.
In Conclusion
Congratulations on taking the plunge into making your own disc golf basket! By crafting a DIY basket, you’re not only enhancing your skills but also investing in your love for the game. Remember, a well-constructed basket can improve your putting practice and make your backyard-or local course-a true disc golf haven. If you’re feeling inspired, check out our guide on Essential Disc Golf Equipment to ensure you have the best tools to elevate your game.
Don’t forget to share your basket-building journey in the comments! We’d love to see photos and hear about your experiences. For more tips on throwing mechanics and disc flight characteristics, explore our articles on Mastering Your Throw and Disc Golf Strategy for Beginners. Join our community by subscribing to our newsletter for the latest updates, exclusive content, and all things disc golf. Let’s keep growing this passionate sport together!